Getting Started Guide
Overview: This is a guide to creating your own NIDAP Code Workbook using the CCBR Bulk RNA-seq Workflow.
This Getting Started Guide is meant as a supplement and summary to the Training Videos, linked here:
CCBR NIDAP Training Page for Bulk RNA-seq Analysis
Step-by-Step: Getting Started Using the CCBR Bulk RNA-seq Workflow
- Why and When to Use This Guide:
- A Code Workbook is an interactive interface for running bioinformatics workflows on NIDAP.
- CCBR has created an Example Code Workbook (linked below) in which a training Bulk RNA-seq dataset has been analyzed.
- Users following along with the Training Videos will duplicate this Example Code Workbook and work through it step-by-step as they learn.
- Once trained, users may also duplicate this Example Code Workbook for use as a template to begin a basic Bulk RNA-seq Analysis of their own dataset.
- This guide outlines the steps you will need to follow to duplicate the Example Code Workbook in your own folder and ensure you can use it there.
Step 1: Open the Example Code Workbook and Wait for the Environment to Load
Open the Example Code Workbook for the CCBR Bulk RNA-seq Workflow, linked here:
CCBR Bulk RNA-seq Workflow Example
Step 2: Duplicate the Example Code Workbook into Your Lab Folder
- You need to duplicate the Example Code Workbook into your own folder so that you can work with that duplicate.
- You must do this to follow along with the Training Videos or to use it as a template for an analysis if
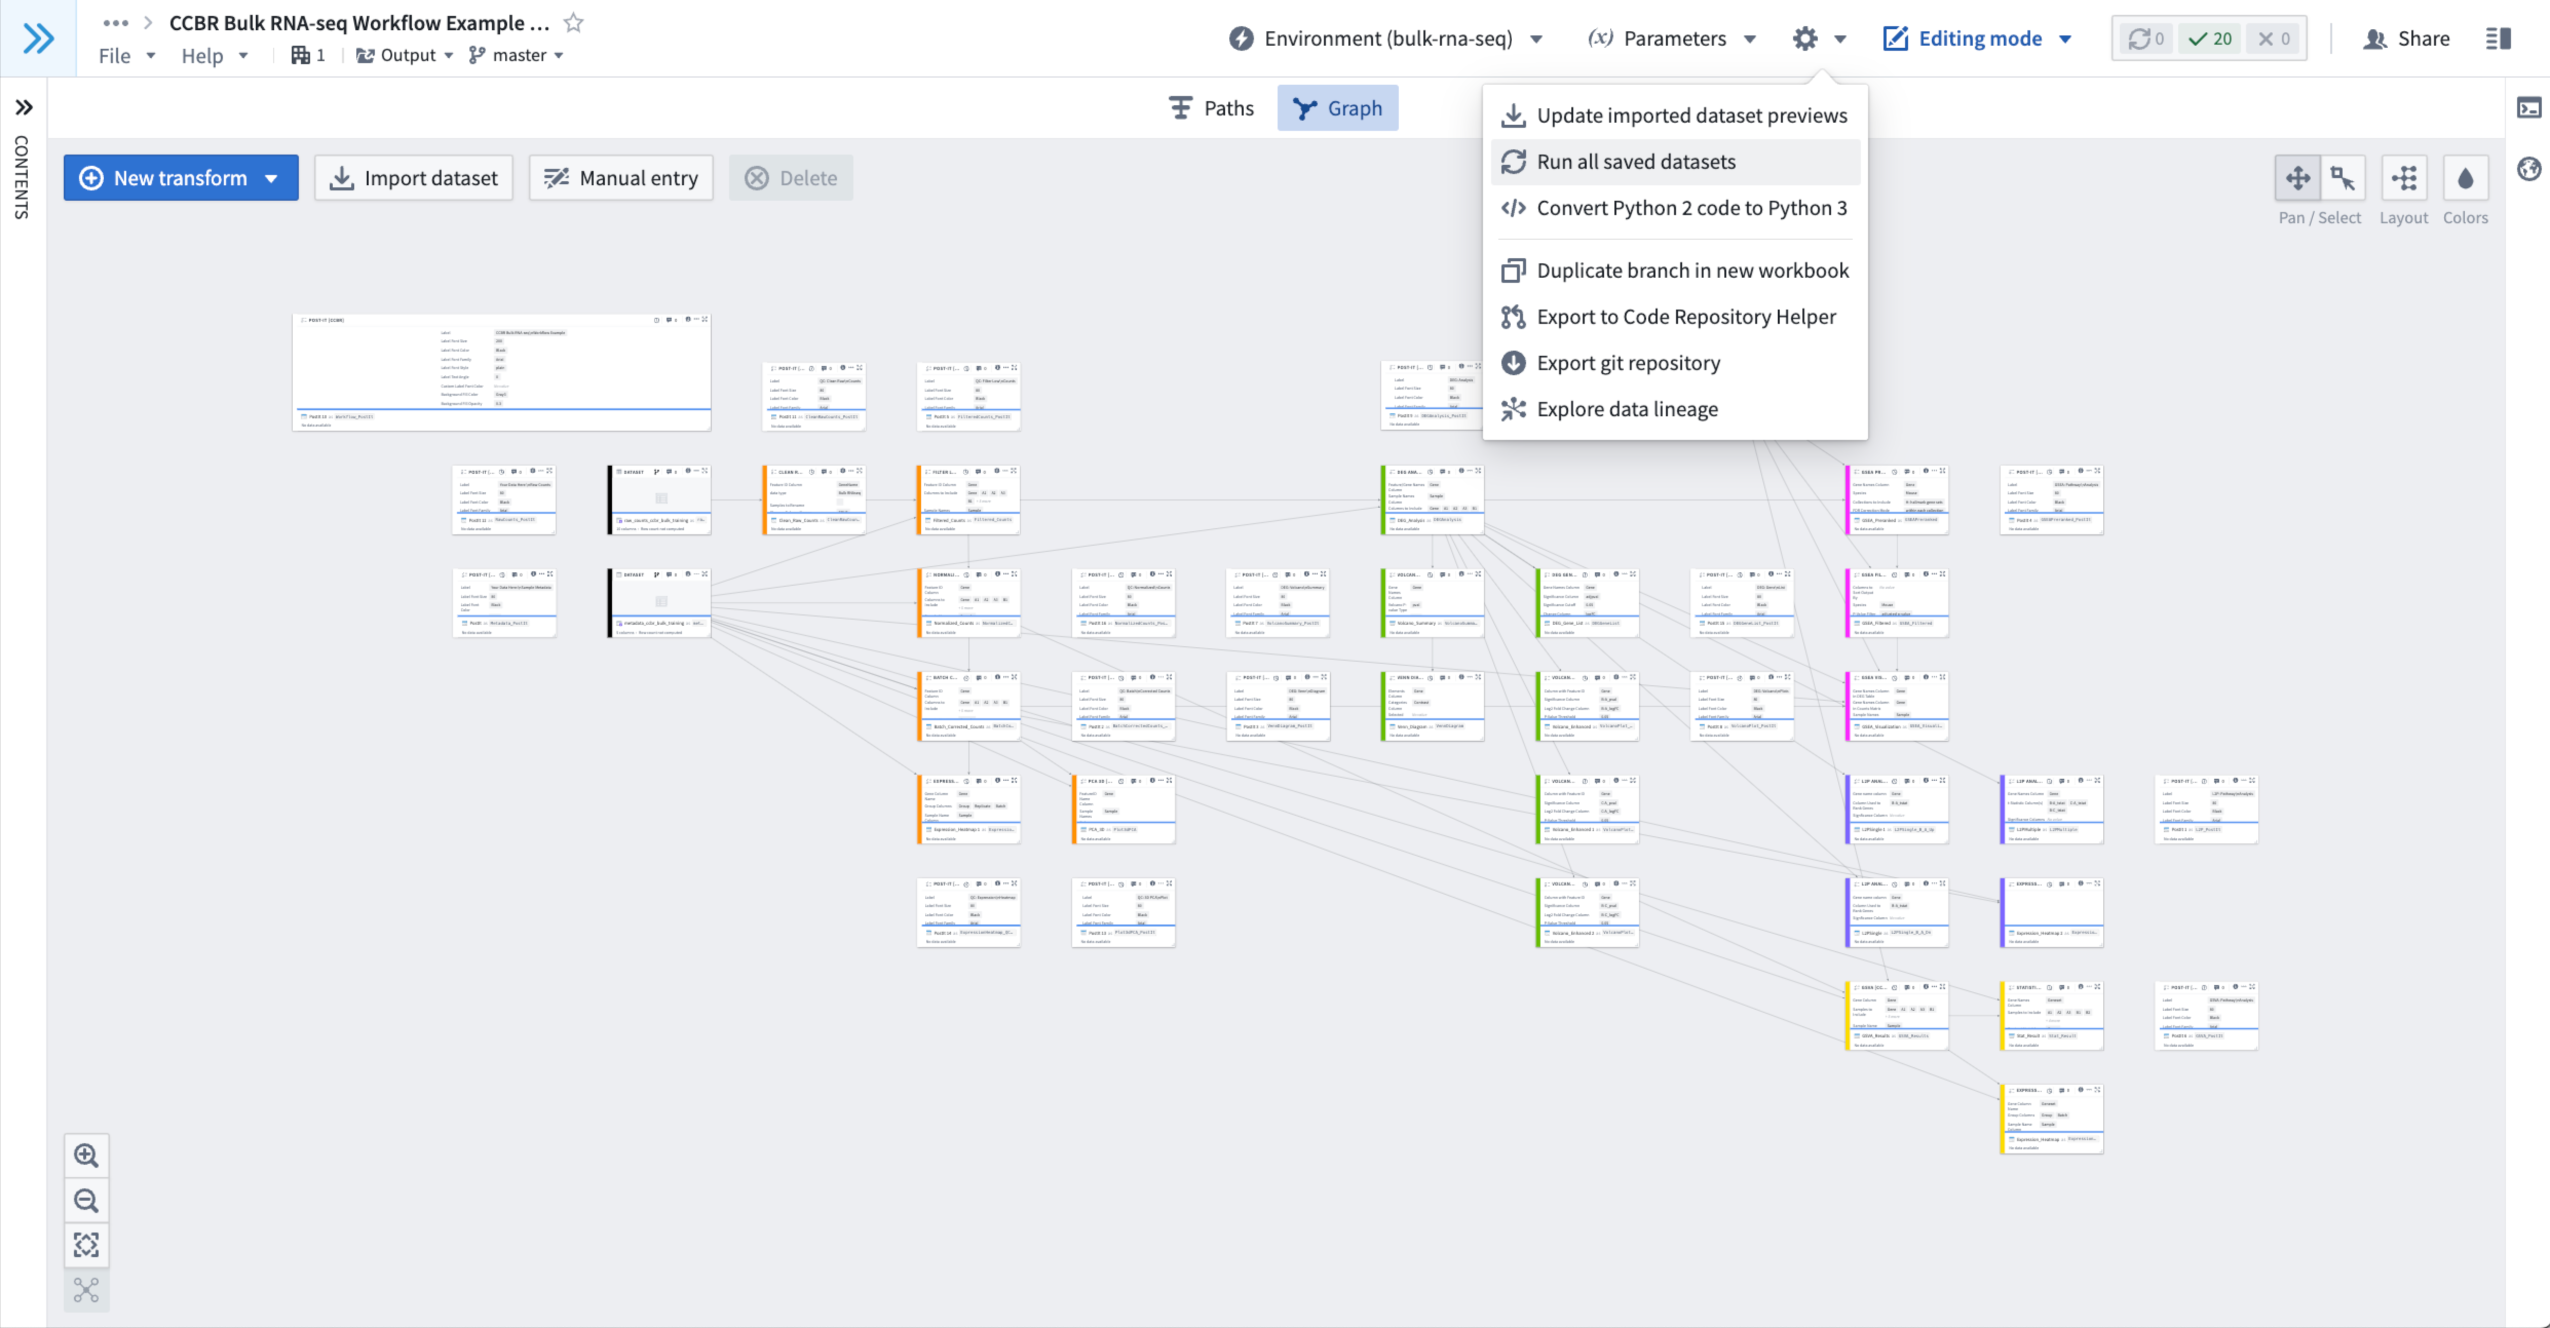
- Click on the Gear Wheel Menu In the upper-right of the Example Code Workbook, to the right of the Environment Menu and Parameters Menu.
- When clicked it provides a drop down menu.
- From this Gear Wheel Menu, select “Duplicate branch in new workbook”.
- Figure 3: The Gear Wheel Menu is used to duplicate the current branch into a new workbook.

- This will open a window that allows you to choose a folder to save the duplicate workbook.
- Figure 3: The Gear Wheel Menu is used to duplicate the current branch into a new workbook.
- This will open a Save new workbook window that allows you to choose a folder to save the duplicate workbook.
- Browse to the folder that you want to save the new workbook within.
- We recommend always using your Lab Folder or a subfolder within it for your work.
- Try using the search bar to find the appropriate folder.
- Figure 4: Saving a duplicate of the current branch of the Example Code Workbook into a new workbook located in an example Lab Folder named “Josh Meyer Lab” (your duplicate should go in your own Lab Folder).

- Click the blue “Save” button in the lower-right of this window to begin the duplication to the chosen location.
- Please be patient; this duplication may take a few minutes.
- Note: By default, the new duplicate will be named for the original workbook, with an added parenthetical annotation of the date and time it was duplicated.
- You may choose to rename the new workbook something more descriptive before you click the blue “Save” button.
- You can always rename the duplicate workbook later if you wish.
- Browse to the folder that you want to save the new workbook within.
- You may see a pop-up window warning you that some “Resources Are Not In the Project Scope”.
- If you see this warning, this is normal and is alerting you that it will be necessary to import these resources into your Lab Folder in order to use the duplicated workbook.
- Click the blue “Import” button to allow these resources to be imported.
- Figure 5: An example of the pop-up window asking you to import the required workflow resources.
- If you see this warning, this is normal and is alerting you that it will be necessary to import these resources into your Lab Folder in order to use the duplicated workbook.

- Once you have chosen a location for your duplicate workbook and agreed to import any needed resources into the destination project scope, you should see a message in the top-center of your screen that reads “Duplicating branch to new workbook…”.
- Please be patient; this duplication may take a few minutes.
- Note: When this duplication completes, this message disappears and you may miss it if you aren’t actively watching.
- We recommend you open another tab in your web browser and navigate to the destination there.
- Then, simply refresh that destination tab once you notice the message has disappeared.
- If the duplication was successful, you should see the new duplicate in your destination folder now.
Step 3: Initialize Your Duplicate Workbook
- Navigate to the duplicate workbook:
- When the workbook is first duplicated successfully, you will not be automatically taken to the duplicate workbook.
- To navigate to your Lab Folder, on the dark grey sidebar on the left side of your screen, click “Projects & files” to search for your Lab Folder where the duplicate workbook was created.
- Note: You may choose to locate a duplicate in any folder you have access to, but we recommend you always use your Lab Folder or a subfolder within it for your work on NIDAP.
- Figure 6: Using “Projects & files” on the left dark gray sidebar to search for an example Lab Folder named “Josh Meyer Lab” (your duplicate should go in your own Lab Folder).

- When you open your code workbook, you must wait for the Environment to Load:
- The first time during a session when a code workbook is opened, the Environment must be loaded.
- The Environment contains all of the necessary code packages, datasets, and other resources needed to run the workflow.
- To see the current status or change the Environment of a code workbook, use the Environment Menu found in the top-center of a code workbook.
- When the Environment is Loading:
- The Environment Menu will display a spinning wheel icon at the top-center of the workbook that will read “Waiting for Spark”, “Initializing environment”, or “Waiting for resources” while the Environment loads.
- Figure 1: An example of an Environment loading; note the “Waiting for resources” message at top-center.

- Note: the above image shows an initialized workbook, but your duplicate will be un-initialized and most nodes will look blank (i.e. white rectangles); please read below for how to initialize a workbook
- Please be patient; loading the Environment may take a few minutes if this is a new session.
- You will know the Environment has finished loading when the Environment Menu at the top-center reads “bulk-rna-seq”.
- When the Environment has Successfully Loaded:
- The spinning wheel icon next to the Environment Menu at the top-center of the workbook will disappear and it will read “Environment (bulk-rna-seq)”.
- The currently loaded Profile is shown in the parentheses (e.g. “bulk-rna-seq”), to show which Environment is currently loaded.
- Each of the CCBR Workflows has its own associated Profile that must be loaded as part of running the workflow.
- Note: Advanced users may use the Environment Menu > Configure environment to select a different Profile or create a custom Profile for their workbook’s Environment. This is not recommended for typical users.
- Figure 2: An example of an Environment that has successfully loaded.

- The spinning wheel icon next to the Environment Menu at the top-center of the workbook will disappear and it will read “Environment (bulk-rna-seq)”.
- The first time during a session when a code workbook is opened, the Environment must be loaded.
- Initialize Your Duplicate Code Workbook:
- The duplicate code workbook you created begins in an uninitialized state.
- In this state, none of the colorful wayfinding labels or thumbnails of results figures you saw in the Example Code Workbook will be visible in your new duplicate workbook.
- We recommend that you initialize the duplicate workbook by running it once to populate it with the default wayfinding labels and results.
- Wait for the Environment to load:
- When you open the duplicate workbook, you will need to wait again for the Environment to load.
- Please be patient; loading the Environment may take a few minutes if this is a new session.
- Run All Saved Datasets in the duplicate workbook:
- In order to initialize the duplicate workbook, we need to run all of the nodes/templates with default settings.
- Click on the Gear Wheel Menu In the upper-right of the Example Code Workbook, to the right of the Environment Menu and Parameters Menu.
- When clicked it provides a drop down menu.
- From this Gear Wheel Menu, select “Run all saved datasets”.
- Figure 7: Using Gear Wheel Menu > “Run all saved datasets” to initialize a fresh duplicate of the Example Code Workbook.

- Now all nodes/templates will run using the training dataset already loaded into the duplicate workbook.
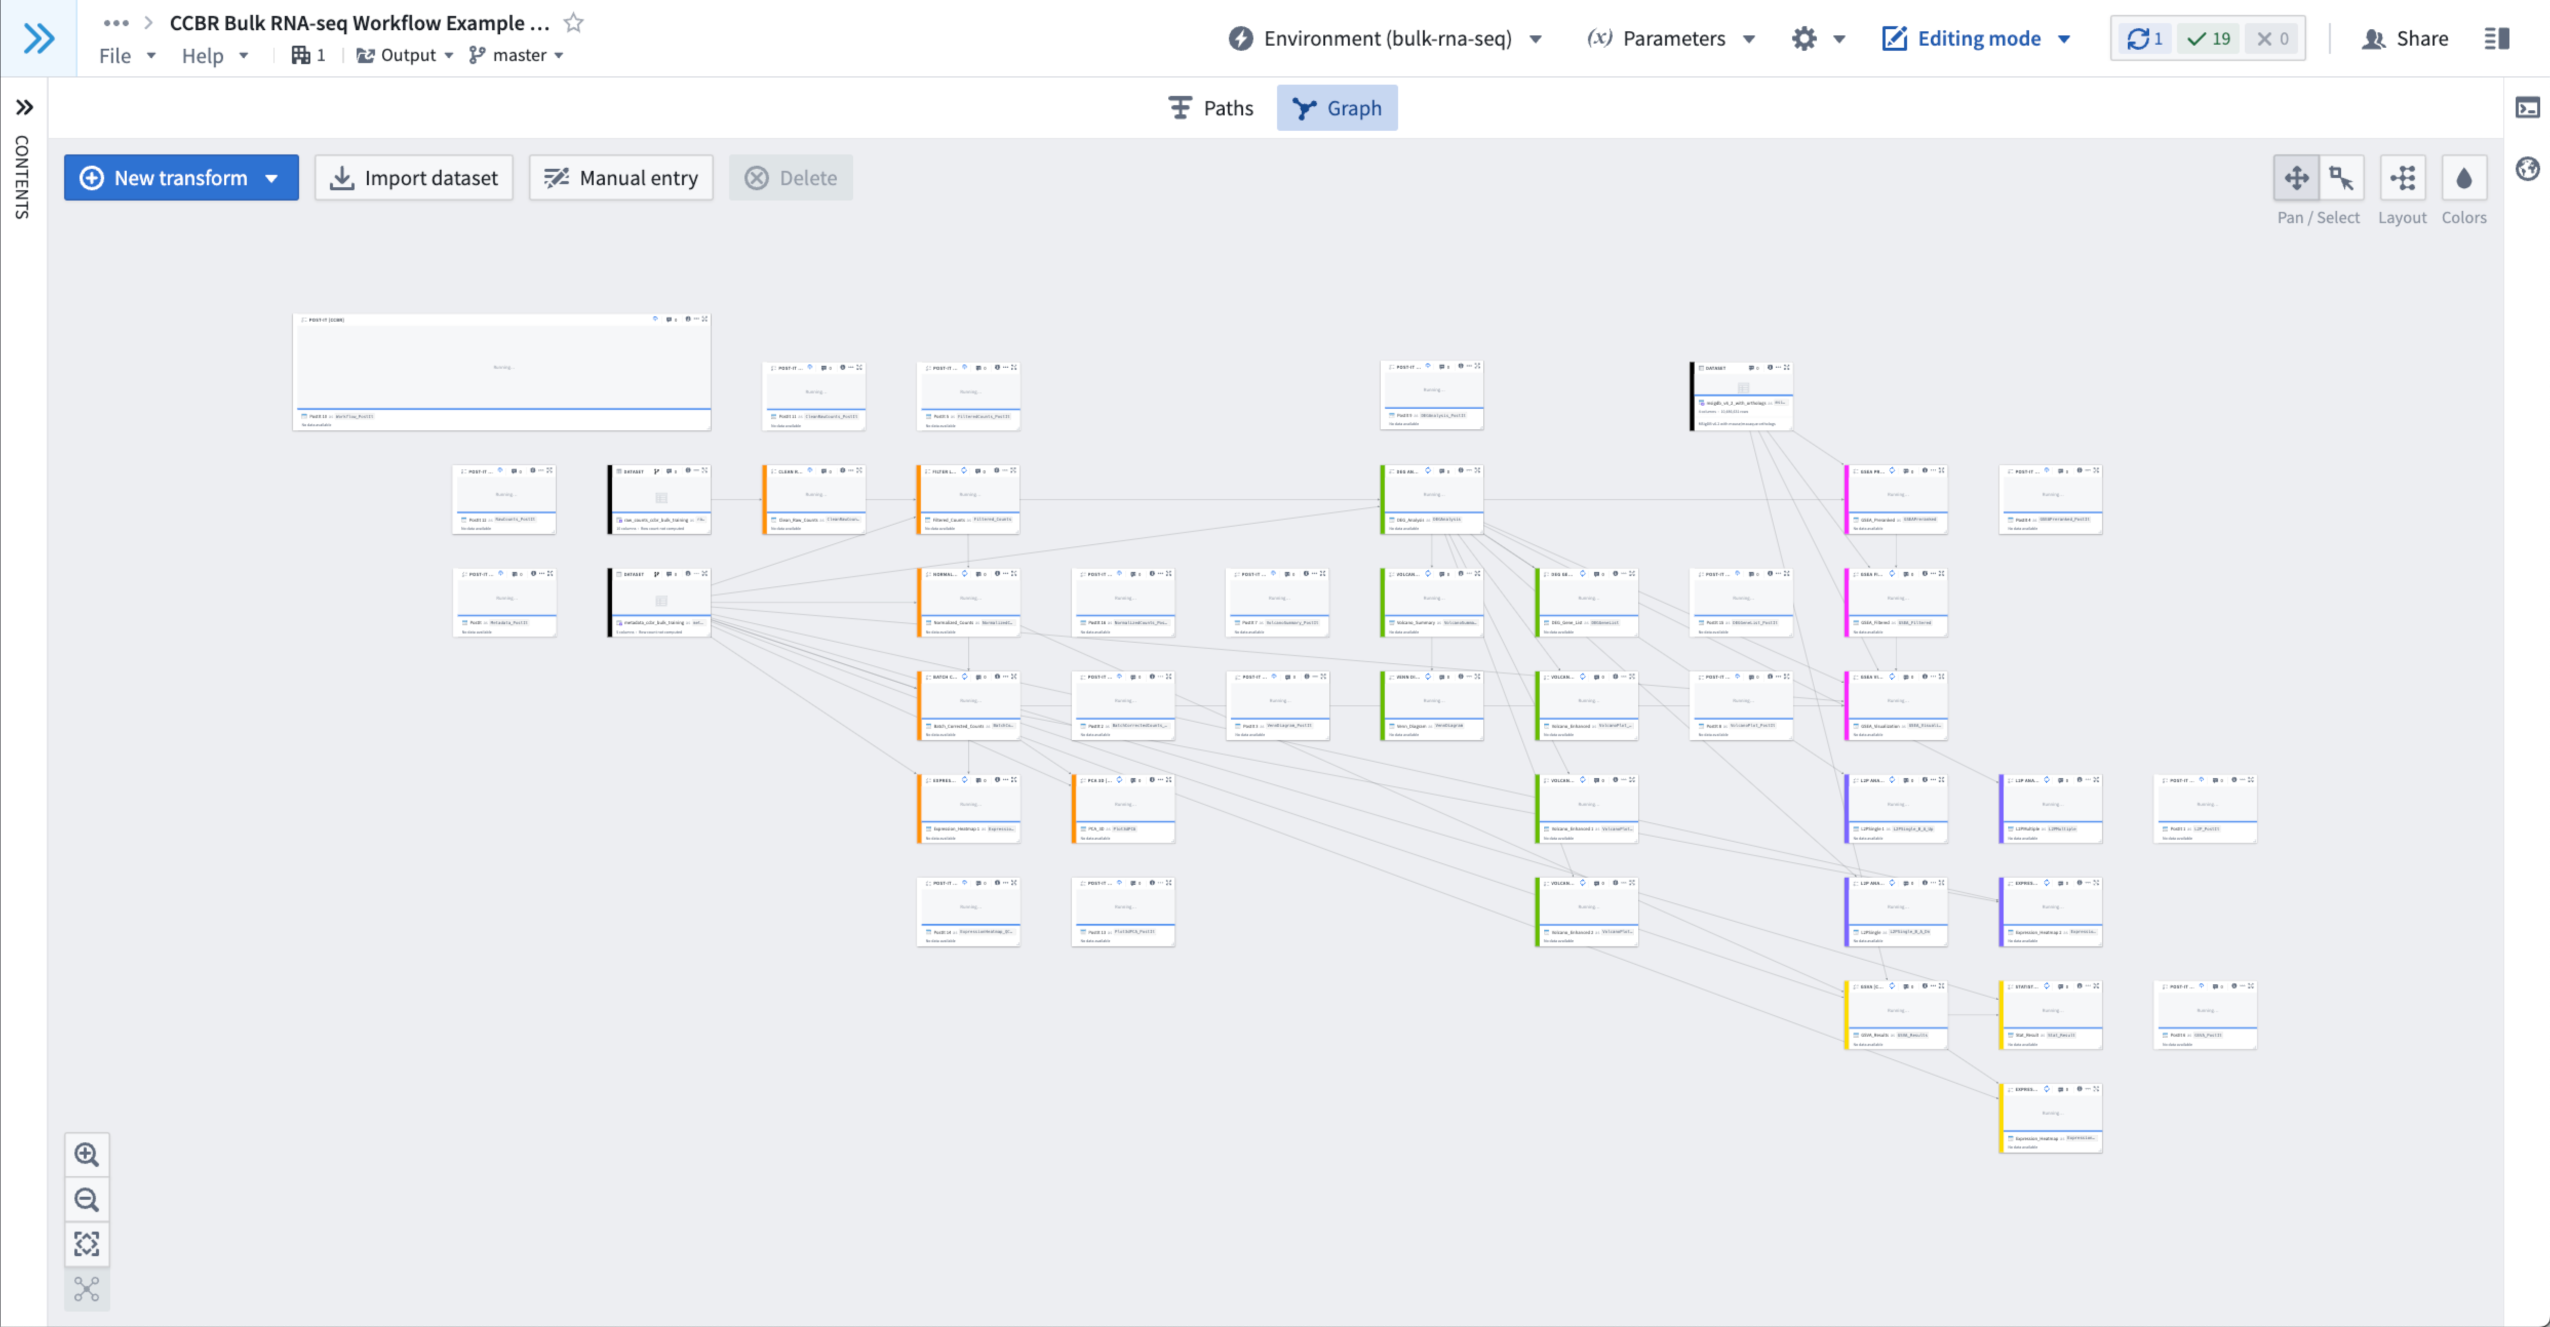
- The nodes will display the message “Running…” while the build is in progress.
- Figure 8: An example of nodes that are still running.

- Please be patient; loading the Environment may take a few minutes if this is a new session.
- Run times can vary for several reasons, but the Example Code Workbook for Bulk RNA-seq should usually run to completion in <10 minutes.
- The duplicate code workbook you created begins in an uninitialized state.
Step 4: Create a Branch
- In order to preserve the original version of the workbook, we recommend creating a branch.
- By creating this branch, you can always refer back to the example workflow from within your duplicated workbook.
- You can then modify the “master” branch as you work, exploring alternative parameterizations, or modifying it for use with a non-training dataset.
- When the the duplicate workflow finished initializing (i.e. all nodes/templates have run to completion), find the Branch Menu in the top-left of your code workbook, just to the right of the File Menu and Help Menu.
- The Branch Menu will likely read “master”.
- All freshly created code workbooks begin with a “master” branch, but you can make as many other branches as you like.
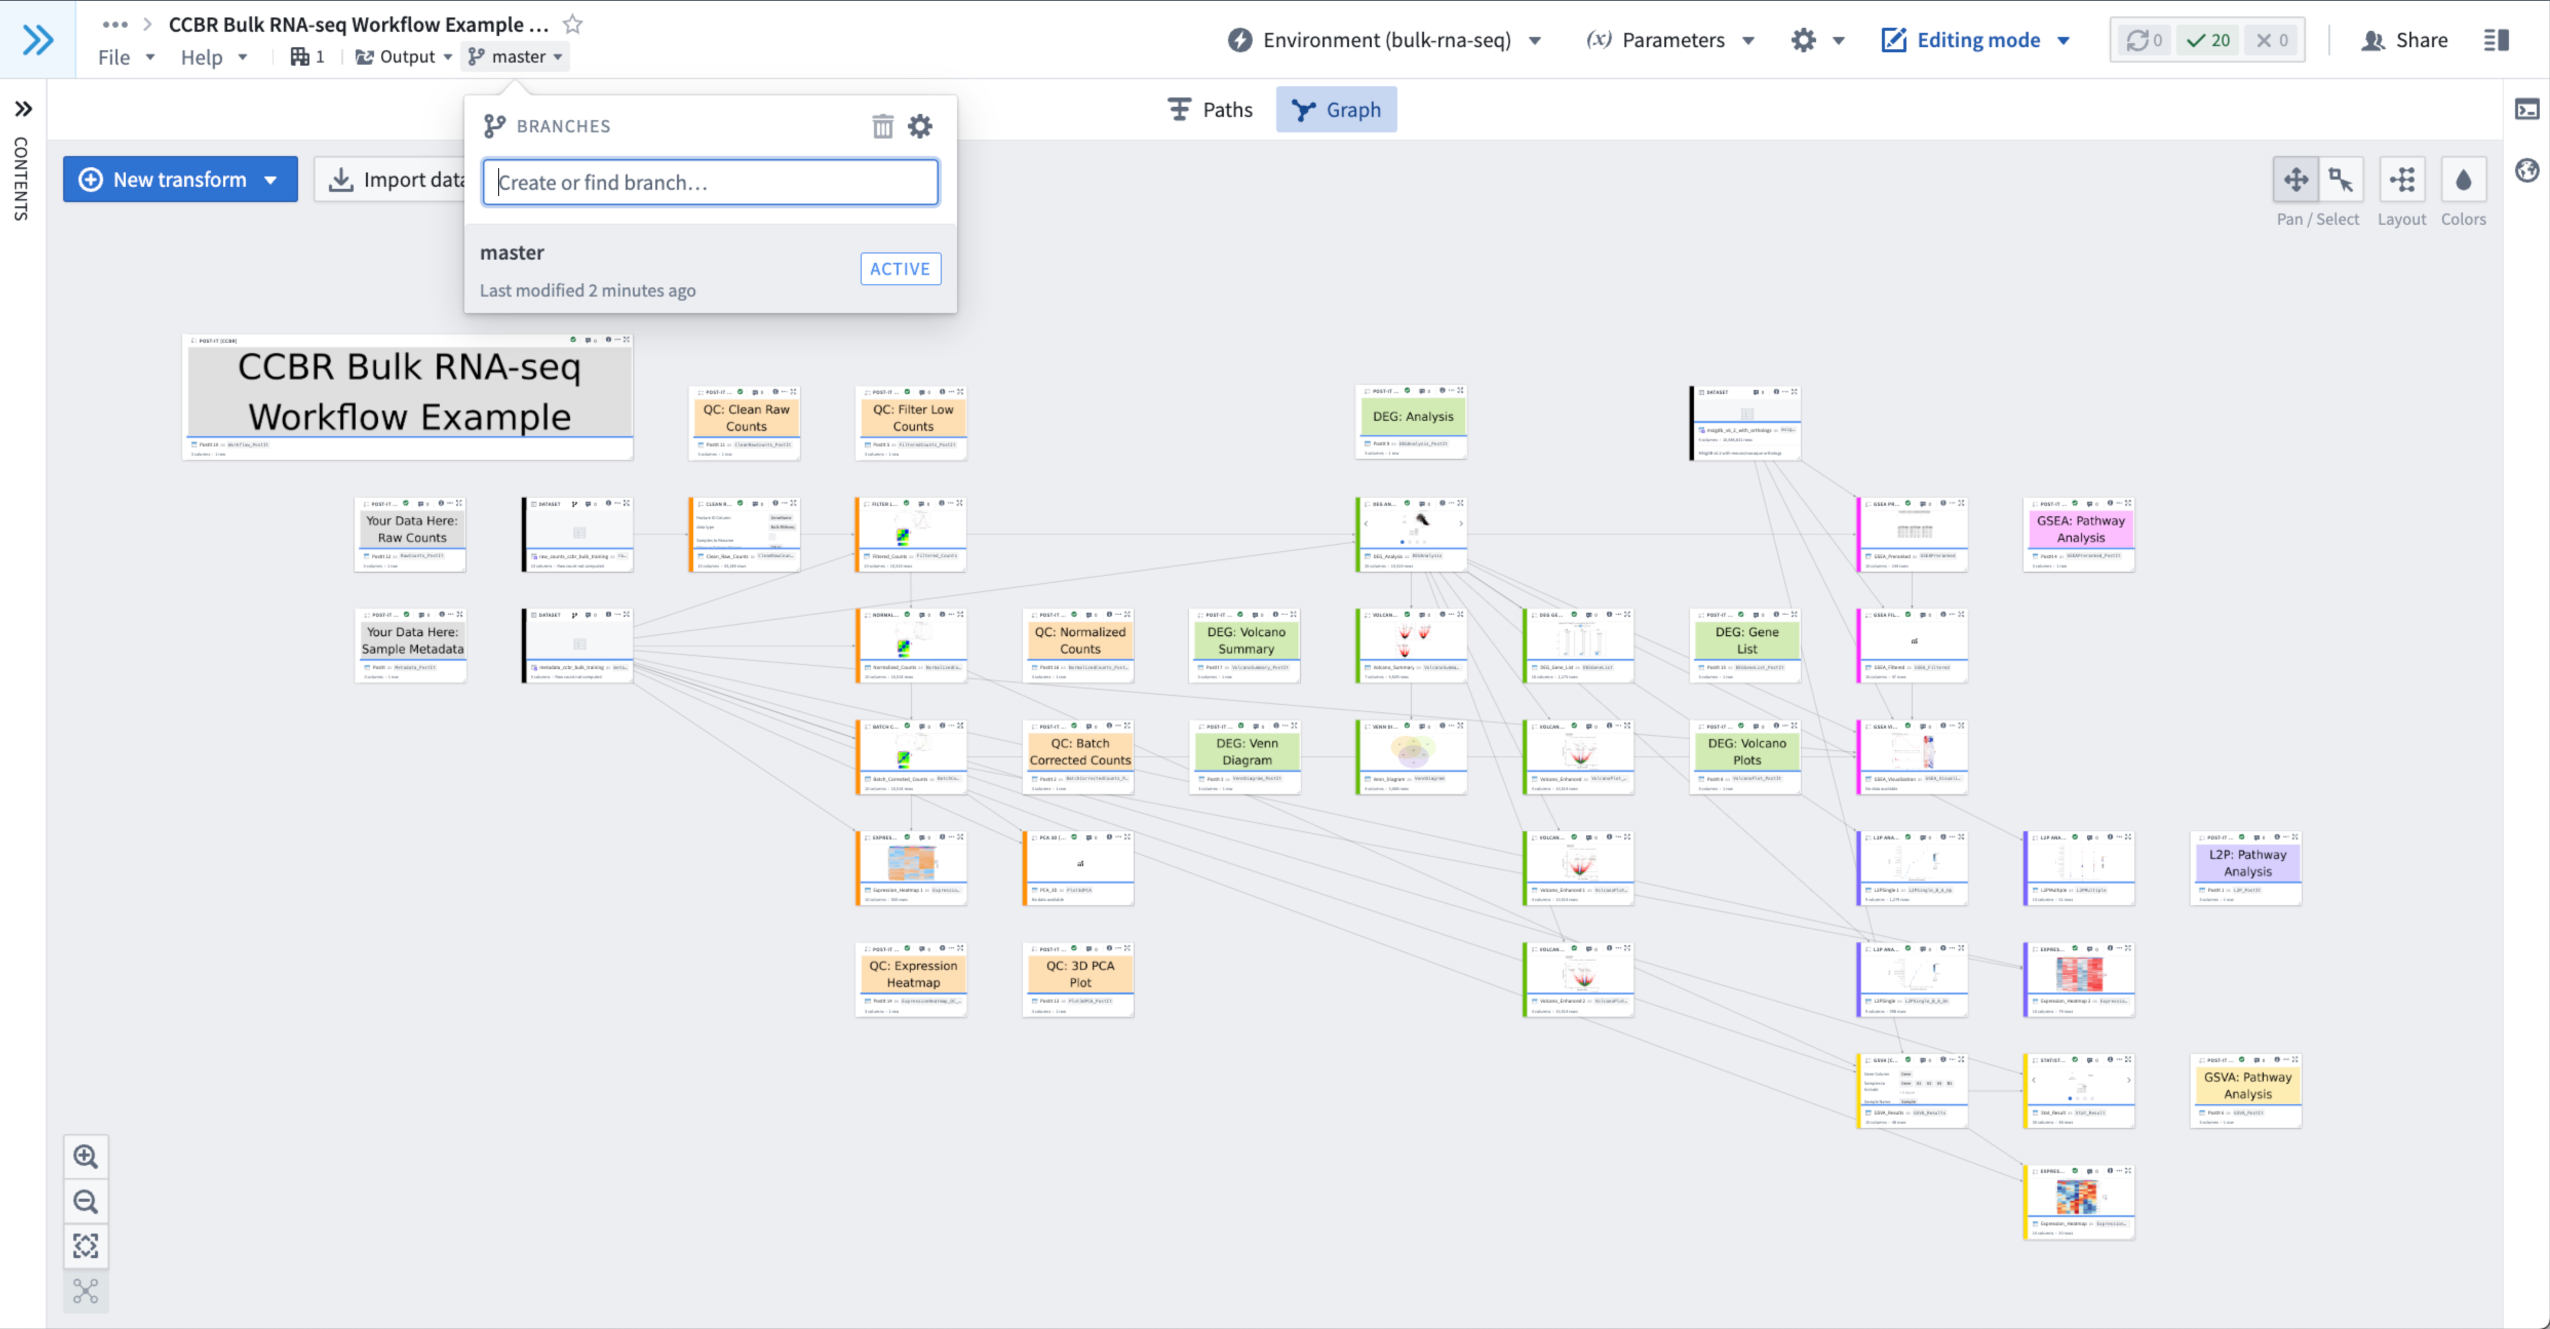
- When you click the Branch Menu, a dropdown menu appears with a box for entering text with the description, “Create or find branch…”.
- Figure 9: An example of the branch drop-down menu.

- Type the name of the new branch you would like to create, for example “Original Example Workbook” and hit enter.
- It may take a few seconds for the branch to be created.
- When the branch is ready, your workbook will change views to show that branch as the current one in the Branch Menu.
- It may take a few seconds for the branch to be created.
- Within the Branch Menu, you can choose to protect any branch you are currently viewing.
- A protected branch cannot be edited, nor can any of the nodes/templates be re-run to produce new output.
- To protect your a branch, make sure the branch is selected in the Branch Menu.
- Then, select the Gear Icon in the upper-right the Branch Menu.
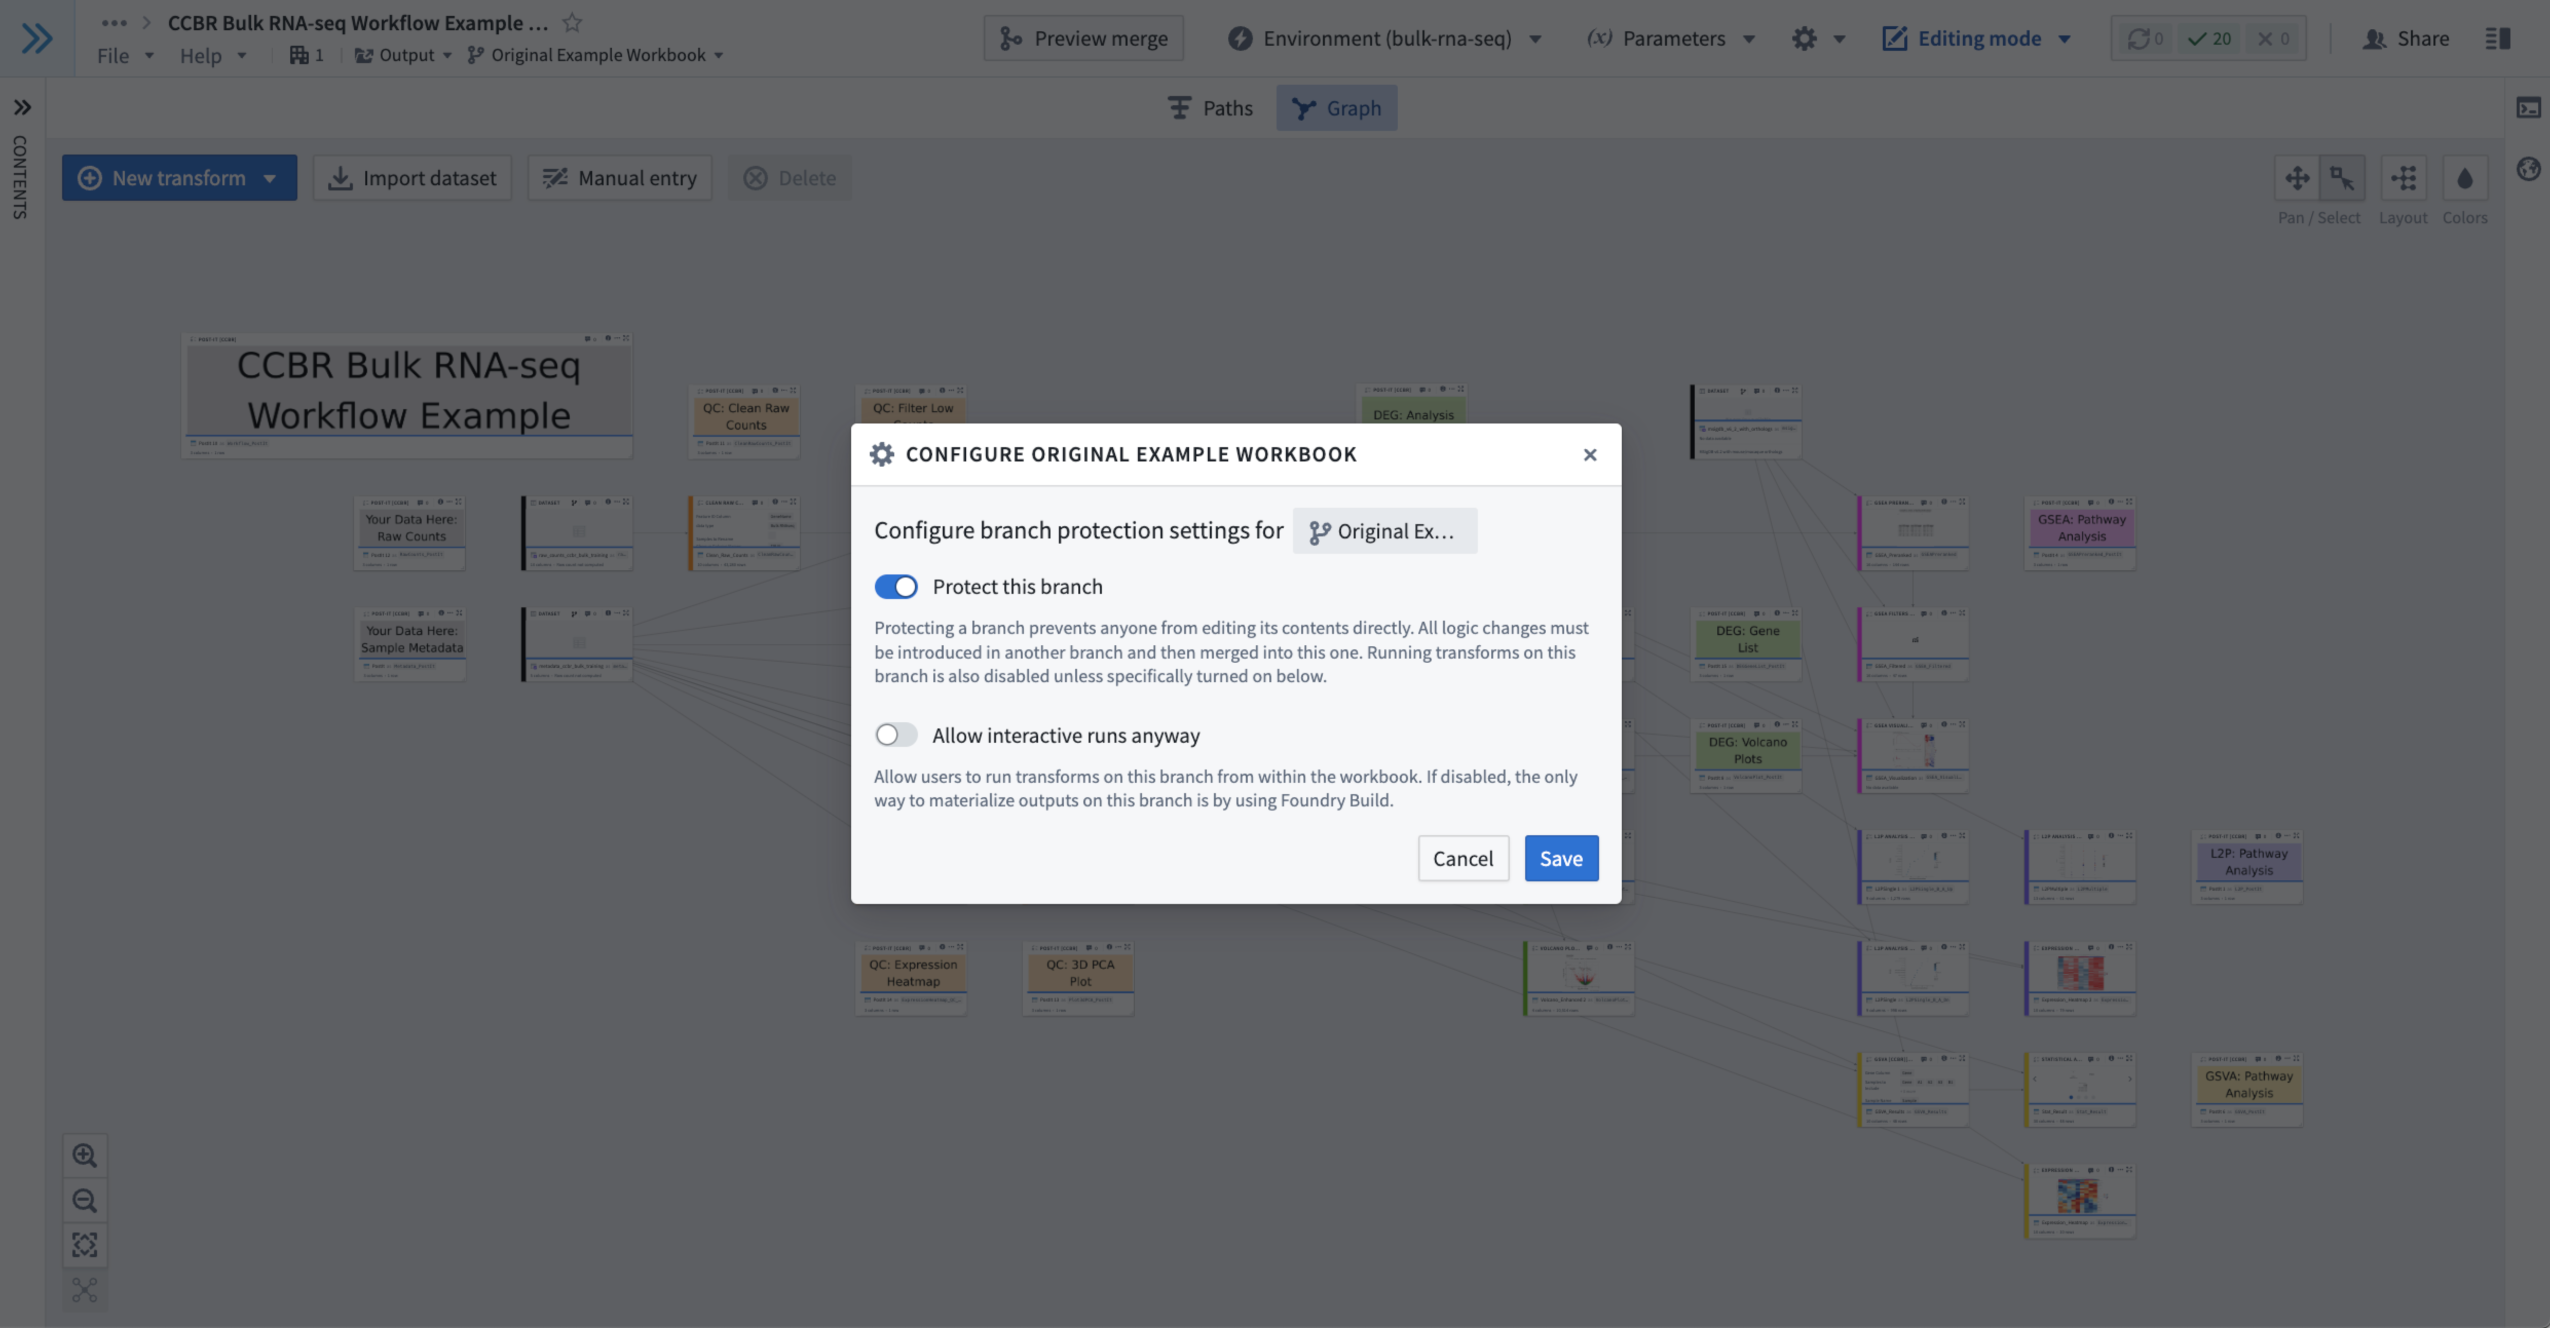
- You will see a pop up window containing protection settings with a toggle labeled “Protect this branch”.
- Turn the “Protect this branch” toggle ON and click the blue “Save” button in the lower-right of the pop-up protection settings window.
- Figure 10: An example of using the branch protection option in which the “Original Example Workbook” branch has been marked as protected.

- Now nothing can be changed on the protected branch until you turn the protection toggle off again.
- You can use the protected branch as a reference and the unprotected branch (e.g. the “master” branch) to make your edits.
- You can create as many branches as you like.
- You can leave any branch protected or unprotected as suits your preferences.
- You may use branch creation and protection as a method to save your work at a given point.
- It is useful to name a branch you are using to save the state of an anlysis carefully so that you know what that branch contains later.
- You may also use branching as a way to explore alternative parameterizations of your analysis.
- This way you can look at how changing parameters alter the results of our analysis without losing the results of the initial parameterization.
- Again, it’s useful to carefully name your branches to ensure you understand what they contain when you return later.
Step 5a: Following the Training Videos
- You can now follow along with the guided tutorial Training Videos and work through a basic Bulk RNA-seq analysis of a training dataset.
- You will begin with Quality Control, followed by the Differential Expression of Genes analysis, and finally learn about Pathway Analysis.
- For a complete guided tutorial and full details how to use the CCBR Bulk RNA-seq Workflow, please reference the Training Videos, linked here:
Step 5b: Import Your Own Data
- You can also import your own Bulk RNA-seq data (or public datasets you may download elsewhere) into NIDAP and use the same CCBR Bulk RNA-seq Workflow to analyze them.
- For a complete guided tutorial and full details on how to import Bulk RNA-seq data into NIDAP for use with this workflow, lease reference the Training Videos, linked here: