Quarto Beyond the Basics: Structured Authoring and Reproducible Workflows
Learning Objectives
By the end of this lesson, you will be able to:
-
Configure document-wide settings using YAML headers to control output format, code display, table of contents, and multi-format rendering
-
Apply chunk-level options using
#|syntax to override YAML defaults and control code execution and output for individual code chunks -
Create cross-referenced figures by using
fig-labels and@fig-labelsyntax to automatically number and reference figures throughout your document -
Manage bibliographic references by creating a
.bibtexfile, linking it in YAML, and citing sources using@citationkeysyntax -
Customize document appearance by applying built-in Quarto themes and creating custom SCSS files to modify colors, fonts, and styling
-
Extend Quarto functionality by installing and using extensions (like
fontawesome) and shortcodes to add icons, embed content, and enhance your documents -
Identify appropriate interactivity options for different use cases (HTML widgets, Observable JS, Shiny) in Quarto documents.
Code Links
-
Basic Volcano Plot (Start here if you want to follow along with the code as we build the report)
-
Final Volcano Plot (Use this as a reference for the final code we will build towards in this presentation)
- Data File (DESeq2 results from the airway package used in the volcano plot example)
- Resource Files (includes the bibliography files, apa.csl, and custom SCSS file used in the example report)
What is Quarto?
Quarto is an open-source scientific and technical publishing system built on pandoc that allows you to combine narrative text, executable code, results, and figures in reports, blogs, books, dashboards, websites, and presentations. It supports a wide range of output formats, making it an ideal tool for creating professional and reproducible documents.
If you have used R Markdown or Jupyter notebooks, Quarto will feel familiar, but with better defaults, greater consistency, and more flexibility.
Key ideas to remember
-
One document, many outputs
A single Quarto source file (.qmd) can be rendered to HTML, PDF, Word, slides, etc. with minimal changes.Note
Quarto can render plain text formats (in addition to .qmd, also .md and .rmd) or mixed formats (e.g., ipynb) into static pdf / word / html reports, books, websites, presentations, etc. https://youtu.be/8qR0wtJEDX4
-
Language-agnostic by design
Quarto supports multiple programming languages (including R, Python, Julia, Observable, and Bash) within the same document, making it well suited for real bioinformatics workflows that span tools and ecosystems. It is also not specific to RStudio and can be used with the IDE or editor of your choice. -
Reproducibility first
Code execution, figures, and results are tightly coupled to the narrative text, reducing the risk of analyses drifting out of sync with their interpretation. -
Project-aware
Quarto supports project-level configuration, allowing you to enforce consistent formatting, execution settings, and structure across many reports. -
Built for communication, not just exploration
Quarto places emphasis on clarity, structure, and presentation, making it especially useful for reports shared with collaborators, PIs, or reviewers.
Get started
👉 To learn more about Quarto including how to get started, refer back to an earlier Coding Club: Getting Started with Quarto
In that session, we covered the basics of Quarto including:
- The basic structure of a Quarto document (YAML + text + code)
- How to include executable code and figures
- How to render a report
Today's intermediate lesson assumes you know the basics of using Quarto as an analysis organization and reporting tool.
Building on this foundation, we will explore more advanced features such as document control with yaml headers and chunk level syntax, cross referencing figures, adding citations, Quarto themes, and working with Quarto shortcode and extensions. This presentation is not meant to be comprehensive, but rather to give you a taste of the many features available in Quarto that can help you create more polished, professional, and reproducible reports.
Caution
For the purposes of this presentation, I will be working with a single html report, but many of the features we discuss will also apply to other output formats.
Controlling your document with YAML headers
A yaml header is a block of metadata at the top of your Quarto document that defines various settings and options for rendering the document. It is written in YAML (YAML Ain't Markup Language), a human-readable data serialization format. The YAML header is enclosed between --- and typically includes information such as the document metadata, formatting options, executions options, and other parameters that control how the document is rendered.
---
title: "My Quarto Document"
author: "Your Name"
date: "2024-06-01"
format: html
---
The YAML syntax is based on key-value pairs, where each key is followed by a colon and the corresponding value. Learn more here.
Important
Options set in the YAML header apply to all chunks in your document unless overridden. This is ideal for setting defaults.
What can we do with the yaml
The YAML header supports a wide range of options for controlling document output. Here are a handful of options you may find useful for your scientific reports:
- include document metadata (title, author, date)
- choose output format (html, pdf, slides, etc)
- control format options (e.g., code folding, themes, table of contents)
- control execution (e.g., caching, error handling, code folding)
- set parameters for dynamic reports
Important
There are many options available in the yaml header. These options will differ based on the output format you choose (e.g., html, pdf, word, slides, etc). Be sure to check the Quarto documentation for a comprehensive list of options and their descriptions: https://quarto.org/docs/reference/. You will need to select your format under the "Formats" drop down to see the relevant options.
Add yaml options to your report
To show how these work, let's build a report. We will start with a basic report that creates a volcano plot using differentially expressed genes.
Let's start by checking out the report. View it here or render the code yourself.
This basic report includes a title and format option in the yaml header. These are the basic options that are created when you start an "Empty Quarto Document" in RStudio.
---
title: "Volcano"
format: html
---
Let's add some more options to customize the look and feel of our report. Check the Quarto documentation for a list of options to include in the yaml front matter: https://quarto.org/docs/reference/formats/html.html
Add a Subtitle, Author, and Date
We can make small changes to the yaml header to add a subtitle, author, and date to our report.
---
title: "Creating a Volcano Plot"
subtitle: "Volcano Quarto Demonstration"
author: "Alex Emmons, Ph.D."
date: today
date-format: "MM/DD/YYYY"
format: html
---
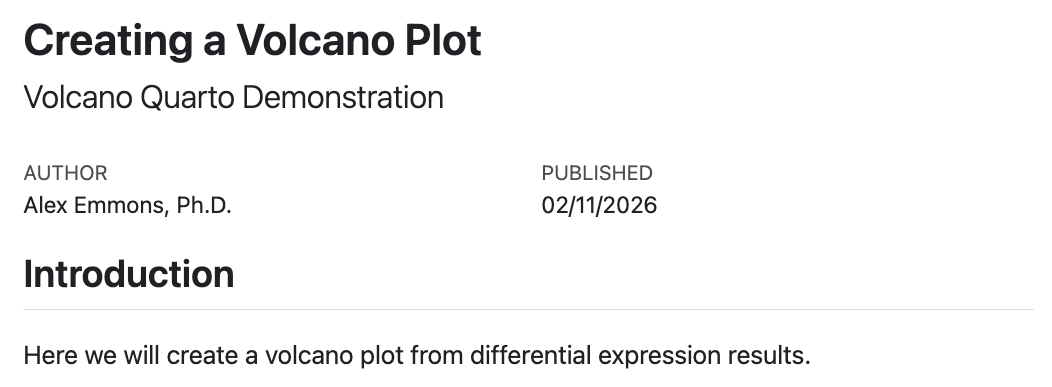
Figure 1: Updated Report with Subtitle, Author, and Date
Note
Quarto can parse dates in a variety of formats. You can dynamically set dates using special key words such as today, now, last-modified, or you can set a specific date. You can also control how the date is formatted with the date-format option. See the documentation for more details: https://quarto.org/docs/reference/dates.html.
Add Table of Contents
We can automatically generate a table of contents for our report by adding the toc option to our yaml header. This will create a table of contents based on the headings in our report. We can also specify the title of the table of contents ('toc-title'), its location (left, right, body, left-body, right-body), and its depth (how many levels of headings to include).
---
title: "Creating a Volcano Plot"
subtitle: "Volcano Quarto Demonstration"
author: "Alex Emmons, Ph.D."
date: today
date-format: "MM/DD/YYYY"
format:
  html:
    toc: true
    toc-location: body
---
Now we have a table of contents that is automatically generated based on the headings in our report. This can be very useful for longer reports with multiple sections. See Figure 2 for an example of the table of contents.
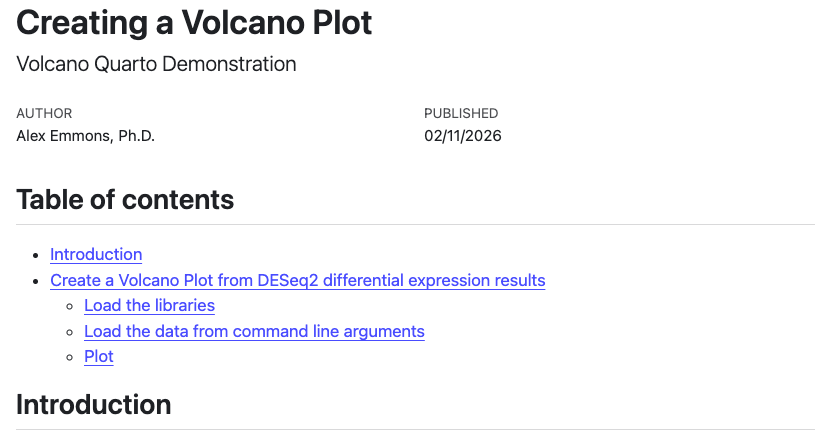
Figure 2: Updated Report with Table of Contents
Add Multiple Output Formats
We can also specify multiple output formats for our report. This allows us to render the same report in different formats (e.g., html, pdf, word) without changing the code. We can do this by specifying a list of formats under the format option in the yaml header. For example, we can specify both html and typst formats like this:
---
title: "Creating a Volcano Plot"
subtitle: "Volcano Quarto Demonstration"
author: "Alex Emmons, Ph.D."
date: today
date-format: "MM/DD/YYYY"
format:
  html: default
  typst: default
knitr:
  opts_chunk:
    dev: svglite

toc: true
toc-location: body
---
Note on format options
Note the placement of toc and toc-location outside of the format option. This is because these options apply to all formats, not just html. For options that apply to only one format or the other, you need to nest them under the appropriate format. We will see this when applying html specific options in the next section.
In Figure 3, we now see the section "Other Formats", which includes a link to the pdf version of the typst output.

Figure 3: Updated Report with Multiple Output Formats
Note on typst
In the example above, we also added a knitr option to specify that we want to use the svglite device for our figures. This is because the default device for typst is svg, which will result in an error with MacOS if XQuartz is not installed.
HTML Specific Options to Control How the Code is Displayed.
When we author reports in Quarto, we may target different types of stakeholders. For example, we may want to share a report with collaborators that includes all the code used to generate the results. Alternatively, we may want to share a report with a PI or reviewer that focuses on the results and interpretation, without showing all the code. Quarto provides several options to control how code is displayed in the final output. These options can be specified under the format option in the yaml header. Here are a few useful options for controlling code displayed in html output:
---
title: "Creating a Volcano Plot"
subtitle: "Volcano Quarto Demonstration"
author: "Alex Emmons, Ph.D."
date: today
date-format: "MM/DD/YYYY"
format:
  html:
    code-fold: true
    code-tools: true
    code-overflow: wrap
  typst: default
knitr:
  opts_chunk:
    dev: svglite
toc: true
toc-location: body
---
code-fold: true will fold the code blocks in the report. This can be useful for hiding code that is not relevant to the main message of the report, while still allowing readers to access it if they are interested.
code-tools: true will add options to the top of the page to show or hide the code blocks, and view the source code (See Figure 4). This can be useful for giving readers more control over how they view the report.
code-overflow: wrap will wrap long lines of code so that they do not overflow the page. This can improve readability, especially for code blocks with long lines.
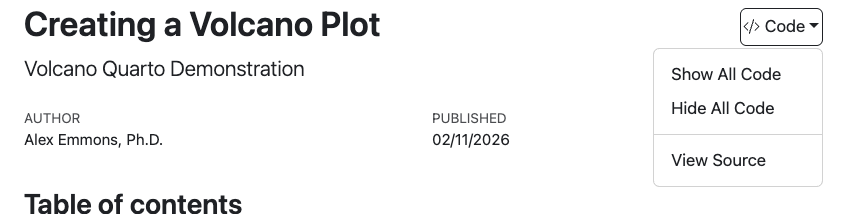
Figure 4: Updated Report with Code Display Options
Additional HTML Options
Some additional options you may want to include to control the appearance, shareability, or functionality of your html reports include:
df-print: pagedwill use a paged table format for printed data frames (showing a limited amount of data that you can then navigate through interactively).embed-resources: truewill embed all resources directly into the html file. This can make it easier to share the report as a single file, without worrying about missing resources (figures, etc.), but it will also increase the file size of the report.page-layout: fullwill use the full width of the page for the content, rather than adding margins on the sides. This can be useful for reports with wide tables or figures that need more space.code-line-numbers: truewill add line numbers to the code blocks in the report. This can be useful for referencing specific lines of code in the narrative text.paramscan be used to set parameters for dynamic reports. This allows you to create reports that can be easily updated with new data or different settings by simply changing the parameter values in the yaml header.
---
title: "Creating a Volcano Plot"
subtitle: "Volcano Quarto Demonstration"
author: "Alex Emmons, Ph.D."
date: last-modified
date-format: "MM/DD/YYYY"
format:
  html:
    df-print: paged
    embed-resources: true
    code-fold: true
    code-tools: true
    code-overflow: wrap
    page-layout: full
toc: true
toc-location: body
params:
  data: "./deseq2_DEGs.csv"
---
Chunk-Level Control
In addition to the yaml header, we can control code execution and display with options specified in the code chunk itself. These options are specified by #| (hash-pipe) syntax in the first few lines of the code chunk. These options give you fine-grained control of your chunks and override YAML defaults.
Basic Syntax
Chunk-level options are specified with #| (hash-pipe) syntax, but they are placed inside the code chunk.
```{r}
#| label: chunk-name
#| echo: false
#| warning: false
Your code here
```
When in doubt, add a label!
The label option allows you to give a descriptive name to your code chunk. This can be useful for debugging, caching, cross-referencing, and embedding code in other documents. The label should be unique within the document and should not contain spaces. Use - rather than _ to separate words in labels to avoid issues with document conversion in pandoc.
There are reserved prefixes for cross-referencing, such as fig- for figures and tbl- for tables.
Why Use Chunk-Level Options?
- Override document defaults for specific chunks
- Self-documenting code - options travel with the chunk
- Required for cross-referencing figures and tables
- Easier to read than the old
{r label, echo=FALSE, warning=FALSE}syntax
Practical Examples from our Example Volcano Plot Report
Let's examine the chunk options in our volcano plot example and understand what each does:
Example 1: Loading Packages Silently
```{r}
#| label: packages
#| message: false
#| warning: false
library(EnhancedVolcano)
library(dplyr)
```
Why these options?
message: false- Suppresses package loading messages (e.g., "Attaching package:dplyr"), which can clutter the output.warning: false- Hides package conflict warnings.label: packages- Descriptive name for debugging.
When to show messages: If you're teaching about package installation or want readers to see version information.
Example 2: Loading Data Quietly
```{r}
#| label: load-data
data <- read.csv(params$data, row.names=1) %>% filter(!is.na(padj))
```
Notice: No output options specified means that options are inherited exclusively from the YAML header and defaults.
Example 3: Including Code or Output
```{r}
#| label: create-labels
labs <- head(row.names(data), 5)
```
Consider: Do readers need to see this preparatory code? If not, you might use:
```{r}
#| label: create-labels
#| include: false
labs <- head(row.names(data), 5)
```
include: false runs the code but shows neither code nor output in the rendered document. This is useful for setup steps. Note that this differs from echo: false (hides code but shows output) and eval: false (shows code but doesn't run it).
Figure Control and Cross-Referencing
One of Quarto's most powerful features is automatic figure numbering and cross-referencing. Let's take a look at useful figure options and how to create cross-referenced figures in our volcano plot example.
Essential Figure Options
```{r}
#| label: fig-volcano-plot
#| fig-cap: "Enhanced Volcano Plot of bulk RNA-seq data from the package airway"
#| fig-alt: "Scatter plot showing the negative log10 p-values on the y-axis and log 2 fold change on the x-axis, with points colored by significance and labeled with gene names."
#| fig-width: 6
#| fig-height: 6
#| warning: false
EnhancedVolcano(data,
                title = "Enhanced Volcano with Airways",
                lab = rownames(data),
                selectLab = labs,
                labSize = 3,
                drawConnectors = TRUE,
                x = 'log2FoldChange',
                y = 'padj')
```
Breaking Down Figure Options
| Option | Purpose | Example |
|---|---|---|
label: fig-* |
Required for cross-referencing. Must start with fig- |
fig-volcano-plot |
fig-cap |
Caption text that appears below figure | "Enhanced Volcano Plot..." |
fig-width |
Width in inches | 6 |
fig-height |
Height in inches | 6 |
fig-alt |
Alt text for accessibility | "Scatter plot showing gene significance" |
warning: false |
Hide warnings (common with ggplot2) | — |
Cross-Referencing the Figure
Once you've labeled a figure with fig-*, reference it anywhere in your text using @:
@fig-volcano-plot shows differentially expressed genes.

As seen in @fig-volcano_plot, several genes exceed the significance threshold.

See the volcano plot (@fig-volcano_plot) for details.
Renders as:
Figure 1 shows differentially expressed genes.
As seen in Figure 1, several genes exceed the significance threshold.
See the volcano plot (Figure 1) for details.
The figure number will update automatically if you add/remove figures.
Cross-referencing with Dynamic Captions
You can also include dynamic content in figure captions using inline code. For example:
::: {#fig-volcano-inline}
```{r}
#| warning: false
#| fig-width: 6
#| fig-height: 6
EnhancedVolcano(data,
                title = "Enhanced Volcano with Airways",
                lab = rownames(data),
                selectLab=labs,
                labSize=3,
                drawConnectors = TRUE,
                x = 'log2FoldChange',
                y = 'padj')

```
Enhanced Volcano Plot of bulk RNA-seq data from the package airway.
The top 5 significant DEGs (`{r} labs`) are labeled.
:::
This uses cross-reference div syntax and results in the following caption with the top 5 significant DEGs dynamically included:
Figure 2: Enhanced Volcano Plot of bulk RNA-seq data from the package airway. The top 5 significant DEGs (ENSG00000152583, ENSG00000165995, ENSG00000120129, ENSG00000101347, ENSG00000189221) are labeled.
This is a powerful way to create dynamic, data-driven captions that automatically update when the underlying data changes.
What are fenced divs?
Fenced divs are blocks of content enclosed by ::: that allow you to apply special formatting or attributes. They're used throughout Quarto to create callouts, figure panels, custom layouts, and more. The syntax ::: {#fig-volcano-inline} we just used is an example of a fenced div with an ID for cross-referencing.
Learn more: https://quarto.org/docs/authoring/markdown-basics.html#divs
To see more options for figure alignment and layout, check out the Quarto documentation: https://quarto.org/docs/authoring/figures.html#figure-options.
Including References and Citations
Why Use Citations in Quarto?
Citations allow you to:
- Give proper credit to original sources.
- Enable readers to find and verify your references.
- Maintain academic integrity.
- Create professional, publication-ready documents.
Add citations and references with Quarto in 5 steps
Step 1: Create a Bibliography File
Create a file to contain the bibliographic information. Quarto accepts multiple sources of bibliographic information (.bib, .bibtex, .json, .yaml, .ris).
The following example will use the BibTeX format (.bibtex). This file should reside in the same directory as your .qmd or in a subdirectory.
Example BibTeX entry:
@misc{doyle2018volcano,
author = "Maria Doyle",
    title = "Visualization of RNA-Seq results with Volcano Plot (Galaxy
  Training Materials)",
    year = "2018",
    month = "",
    day = "",
    url = "https://training.galaxyproject.org/training-material/topics/
  transcriptomics/tutorials/rna-seq-viz-with-volcanoplot/tutorial.html",
    note = "[Online; accessed Thu Feb 19 2026]"
}
Key components:
@misc- Entry type (use@articlefor papers,@bookfor books, etc.)doyle2018volcano- Citation key (you'll use this to cite the work)- Fields like
author,title,year,url- Bibliographic information
Note
You can obtain BibTeX formatted references from Google Scholar, Endnote, Mendeley, and other sources. You do not have to create these yourself.
Step 2: Link the Bibliography to Your Quarto Document
To link our bibliography to our Quarto document, we add an option to our YAML header.
For example,
---
title: "Your Document Title"
author: "Your Name"
bibliography: references.bibtex
---
That's it! Quarto now knows where to find your references.
Step 3: Cite Sources in Your Text
To use in-text citations, we use the @ symbol followed by the citation key (from your .bibtex file).
In-text citation:
Learn more about Volcano plots in this Galaxy Training Network
tutorial [@doyle2018volcano].
This renders as: "...tutorial (Doyle 2018)."
Multiple citations:
Volcano plots are widely used [@doyle2018volcano; @another2024].
Narrative citation:
As discussed by @doyle2018volcano, volcano plots help identify...
This renders as: "As discussed by Doyle (2018)..."
Learn more in the Quarto Documentation.
Step 4: Add a References Section (Optional)
At the end of your document, add:
## References
::: {#refs}
:::
Quarto will automatically populate this section with all cited works. The {#refs} div tells Quarto where to place the formatted reference list.
Automatically Generated Reference Section
If you do not designate a ## References section. This will automatically be generated by Quarto and placed at the end of the document. Including this section yourself, gives you better document control.
Step 5: Customize the Citation Style
Because Quarto uses Pandoc for citation formatting, the default style is Chicago Manual of Style.
Want APA, CSE, or another style? Add a Citation Style Language (CSL) file to your resource path and declare it in your YAML header:
---
bibliography: references.bibtex
csl: apa.csl
---
You can download CSL files from:
Place the CSL file in your project directory or a subdirectory (such as resources/), then reference it with the relative path in your YAML header.
Practical Example from Our Volcano Plot Document
Original text with hyperlink:
Learn more about Volcano plots [here](https://training.galaxyproject.org
/training-material/topics/transcriptomics/tutorials/rna-seq-viz-with-
volcanoplot/tutorial.html).
Improved version with citation:
Learn more about volcano plots in the Galaxy Training Network
tutorial [@doyle2018volcano].
What changed?
- Created
references.bibtexwith the BibTeX entry - Added
bibliography: references.bibtexto YAML header - Replaced hyperlink with citation key
[@doyle2018volcano] - Added References section at document end
Tips for Bioinformatics Documentation
- Use reference managers: Tools like Zotero or Mendeley can export BibTeX files automatically
- Consistent citation keys: Use a pattern like
firstauthoryearkeyword(e.g.,batut2023rna) -
Cite software packages: Include R packages, pipelines, and databases you use.
-
Using R? Level-up with the R package
grateful- Generate a .bib file with package citations with
cite_packages(out.dir = "./resources/"). -
Include a section in the report for packages:
## Packages

This report relied on the following R packages:

```{r}
pkgs <- cite_packages(output = "table", out.dir = ".")
knitr::kable(pkgs)
```
- Generate a .bib file with package citations with
-
Keep one master .bibtex file: Reuse across multiple projects. Only the references that get cited will appear in the reference section of each document.
Quarto Themes & Customization
What Are Quarto Themes?
Quarto themes control the visual appearance of your documents, presentations, and websites. Out of the box, Quarto provides 25 built-in themes including cosmo, flatly, darkly, journal, etc. These themes are available from the Bootswatch Project. By default, Quarto uses the default theme, which is based on Bootstrap 5.
Here are some popular themes you may want to consider for your scientific reports:
- Academic/Professional:
flatly,sandstone,cosmo - Modern/Clean:
lux,minty,pulse - Dark-friendly:
darkly,slate,superhero - Minimal:
default,simplex
Tip
Start with a built-in theme as a foundation, then customize it to fit your branding or preferences. This is much easier than building a theme from scratch.
Setting Your Theme
Themes can be declared in the YAML header using:
theme: flatly
theme:
  light: flatly
  dark: darkly
Customizing Themes with SCSS
The power of Quarto themes comes from customizing these themes to match your branding or preferences. With Quarto, we do this by pointing to an scss file that includes our customizations.
theme:
  - flatly
  - custom.scss
What goes in the custom.scss file? Let's find out.
Options Beyond SCSS
You can specify theme options directly in the YAML header, but this is limited to a predefined set of options. You can also use in-line html styling in your document, but this is not recommended for scientific reports. For more control and flexibility, it's better to create a custom SCSS file. You can then use your SCSS file to customize future documents by simply referencing it in the YAML header.
Limit your customizations to what you need
When customizing themes, it's best to limit your customizations to only what you need. Identify the specific elements you want to customize (e.g., heading colors, font sizes, spacing) and only include those in your SCSS file. This will make your customizations easier to maintain and update in the future. Less is more when it comes to theme customizations.
Understanding CSS and SCSS
To understand how to customize theme elements to make your document appear a certain way, you should be minimally familiar with CSS and SCSS.
CSS (Cascading Style Sheets) vs SCSS (Sassy CSS)
CSS is the standard language for styling web pages. It controls colors, fonts, spacing, and layout. A simple CSS rule looks like this:
h2 {
  background-color: #2c3e50;
  color: #eaeded;
  padding: 0.5rem 1rem;
}
SCSS is an extension of CSS that adds powerful features like variables, nesting, mixins, and functions. This makes it easier to write and maintain complex stylesheets.
SCSS files compile into regular CSS, so browsers can understand them. Think of SCSS as "CSS with superpowers."
Anatomy of a Quarto SCSS File
For Quarto, we can provide our customizations in SCSS.
Quarto SCSS files have two primary sections:
/*-- scss:defaults --*/
This section is for defining variables. Variables let you store values that you'll reuse throughout your stylesheet. You can use predefined variables listed in the Quarto documentation, Bootstrap variables, or create your own.
For example, you might define colors for your headings like this:
/*-- scss:defaults --*/

$heading-dark-bg: #2c3e50;
$heading-dark-text: #eaeded;
$heading-light-bg: #c0c5cb;
$heading-light-text: #2c3e50;
Why use variables? If you later decide to change your dark heading color, you only update it in one place ($heading-dark-bg), and it applies everywhere you've used that variable.
/*-- scss:rules --*/
This section contains your actual styling rules. Here's where you apply your variables and write CSS-like code:
/*-- scss:rules --*/

h2 {
  background-color: $heading-dark-bg;
  color: $heading-dark-text;
  padding: 0.5rem 1rem
}

h3, h4 {
  background-color: $heading-light-bg;
  color: $heading-light-text;
  padding: 0.25rem 1rem
}
This code set the following styles for headings in our document:
Level 2 Headings (##):
- Dark blue-gray background (
#2c3e50) - Light text (
#eaeded) - More padding around the text (8px top/bottom, 16px left/right)
Level 3 and 4 Headings (### and ####):
- Light gray background (
#c0c5cb) - Dark text (
#2c3e50) - Less padding (4px top/bottom, 16px left/right)
px, em, and rem
When customizing spacing, fonts, and other measurements in your SCSS file, you'll encounter different size units:
- px (pixels): Absolute units that don't scale with user preferences.
- em: Relative to the font size of the parent element. Can compound when nested.
- rem: Relative to the root font size (usually 16px by default). 1rem = 16px in most browsers.
Learn more about how these differ and when to use them here: The Surprising Truth About Pixels and Accessibility
Note
"The variables section is denoted by the /*-- scss:defaults --*/ comment and the rules section (where normal CSS rules go) is denoted by the /*-- scss:rules --*/ comment." These comments are required for Quarto to parse the file correctly.
Creating Your SCSS File
Step 1: Create the File
Create a new file with a .scss extension, for example: custom-theme.scss
Step 2: Structure Your File
/*-- scss:defaults --*/
// Define your variables here

/*-- scss:rules --*/
// Write your styling rules here
//) to organize your code, but be sure to include the required comments for Quarto to recognize the sections.
Step 3: Link to Your Quarto Document
In your Quarto document's YAML header, reference your SCSS file:
---
title: "My Document"
format:
  html:
    theme:
      - cosmo
      - custom-theme.scss
---
Or for a custom theme only:
---
title: "My Document"
format:
  html:
    theme: custom-theme.scss
---
Quarto Extensions and Shortcodes
Quarto extensions are another way to customize your documents and add functionality. Extensions are reusable pieces of code that can be included in your document to perform specific tasks, such as including icons, embedding videos, creating interactive elements, adding custom styling (using templates), and more. You can find a list of available extensions on the Quarto website. You can find others on GitHub or create your own. For a searchable list of Quarto extensions, check this out.
What are Shortcodes?
Shortcodes are a type of extension that allows you to create custom markdown syntax for common tasks.
Example: Using font-awesome icons with the fontawesome shortcode
Perhaps we want to spice up our report with some icons. We can use the fontawesome shortcode to easily include icons from the free Font Awesome library. First, we need to install the Quarto fontawesome extension. You can do this by running the following command in your terminal from within your project directory:
```{bash}
quarto add quarto-ext/fontawesome
```
Extension Documentation
To learn more about a given extension, including its installation, check out the documentation for that extension. For example, the documentation for the fontawesome extension is available here: https://github.com/quarto-ext/fontawesome. This will give you details on how to use the extension, including the syntax for the shortcode.
After you install the extension, you will notice a subdirectory called quarto-ext in your project directory. This is where the extension files are stored.
Adding Icons to Your Report
Let's add a volcano icon to our volcano plot report. We can do this with the following shortcode syntax:
{{< fa solid volcano >}}
In our report, we can include the shortcode like this:
## {{< fa solid volcano >}} Create a Volcano Plot from DESeq2...
This will render a solid volcano icon from the Font Awesome library.
Additional Shortcode Resources
Quarto provides a list of built-in shortcodes that you can use in your documents, which are available here: https://quarto.org/docs/extensions/shortcodes.html#built-in-shortcodes. If you want to create your own shortcode for a specific task, you can learn how to do that here using Lua: https://quarto.org/docs/extensions/shortcodes.html#quick-start.
Commonly used built-in shortcodes include:
embedfor embedding Quarto documents or Jupyter notebooks into other documentsincludefor including content from other files.versionfor displaying the Quarto CLI version.
Making Your Documents Interactive
Quarto supports several approaches to add interactivity to your reports, allowing readers to explore data dynamically rather than viewing static outputs.
Options for Interactivity in Quarto
1. HTML Widgets (R)
R packages like plotly, DT, leaflet, and dygraphs create interactive JavaScript visualizations that work in static HTML documents—no server required.
2. Jupyter Widgets (Python)
Python libraries like Leaflet, Plotly, and threejsprovide interactive elements for Python-based Quarto documents.
3. Observable JS
Native JavaScript reactivity built into Quarto. Ideal for custom interactive visualizations and data exploration.
4. Shiny (R & Python)
Full server-side interactivity with reactive inputs and outputs. Requires a Shiny server to run but enables interactive applications.
Tip
Choosing your approach:
- For simple interactivity in shareable HTML reports → HTML Widgets or Jupyter Widgets.
- For custom, lightweight interactions → Observable JS.
- For complex, stateful applications → Shiny.
If interest, next time I will show you how to make our volcano plot interactive with shiny and embed the interactive figure in our report. Stay tuned!
Additional Resources
-
Quarto Documentation https://quarto.org
-
Publishing to GitHub Pages https://quarto.org/docs/publishing/github-pages.html
-
Awesome Quarto https://github.com/mcanouil/awesome-quarto.
- Quarto: The Practical Guide https://quarto-tdg.org/.
- HTML basics - https://quarto.org/docs/output-formats/html-basics.html
- Markdown basics - https://quarto.org/docs/authoring/markdown-basics.html